
아무고토 몰라효
[Android] 안드로이드 ToggleButton, Switch 사용법 본문
반응형
👼🏻 초보 안드로이드 개발자가 매번 구글링하기 싫어서 정리하는 블로그 👼🏻
안녕하세요! 🙋🏻♀️
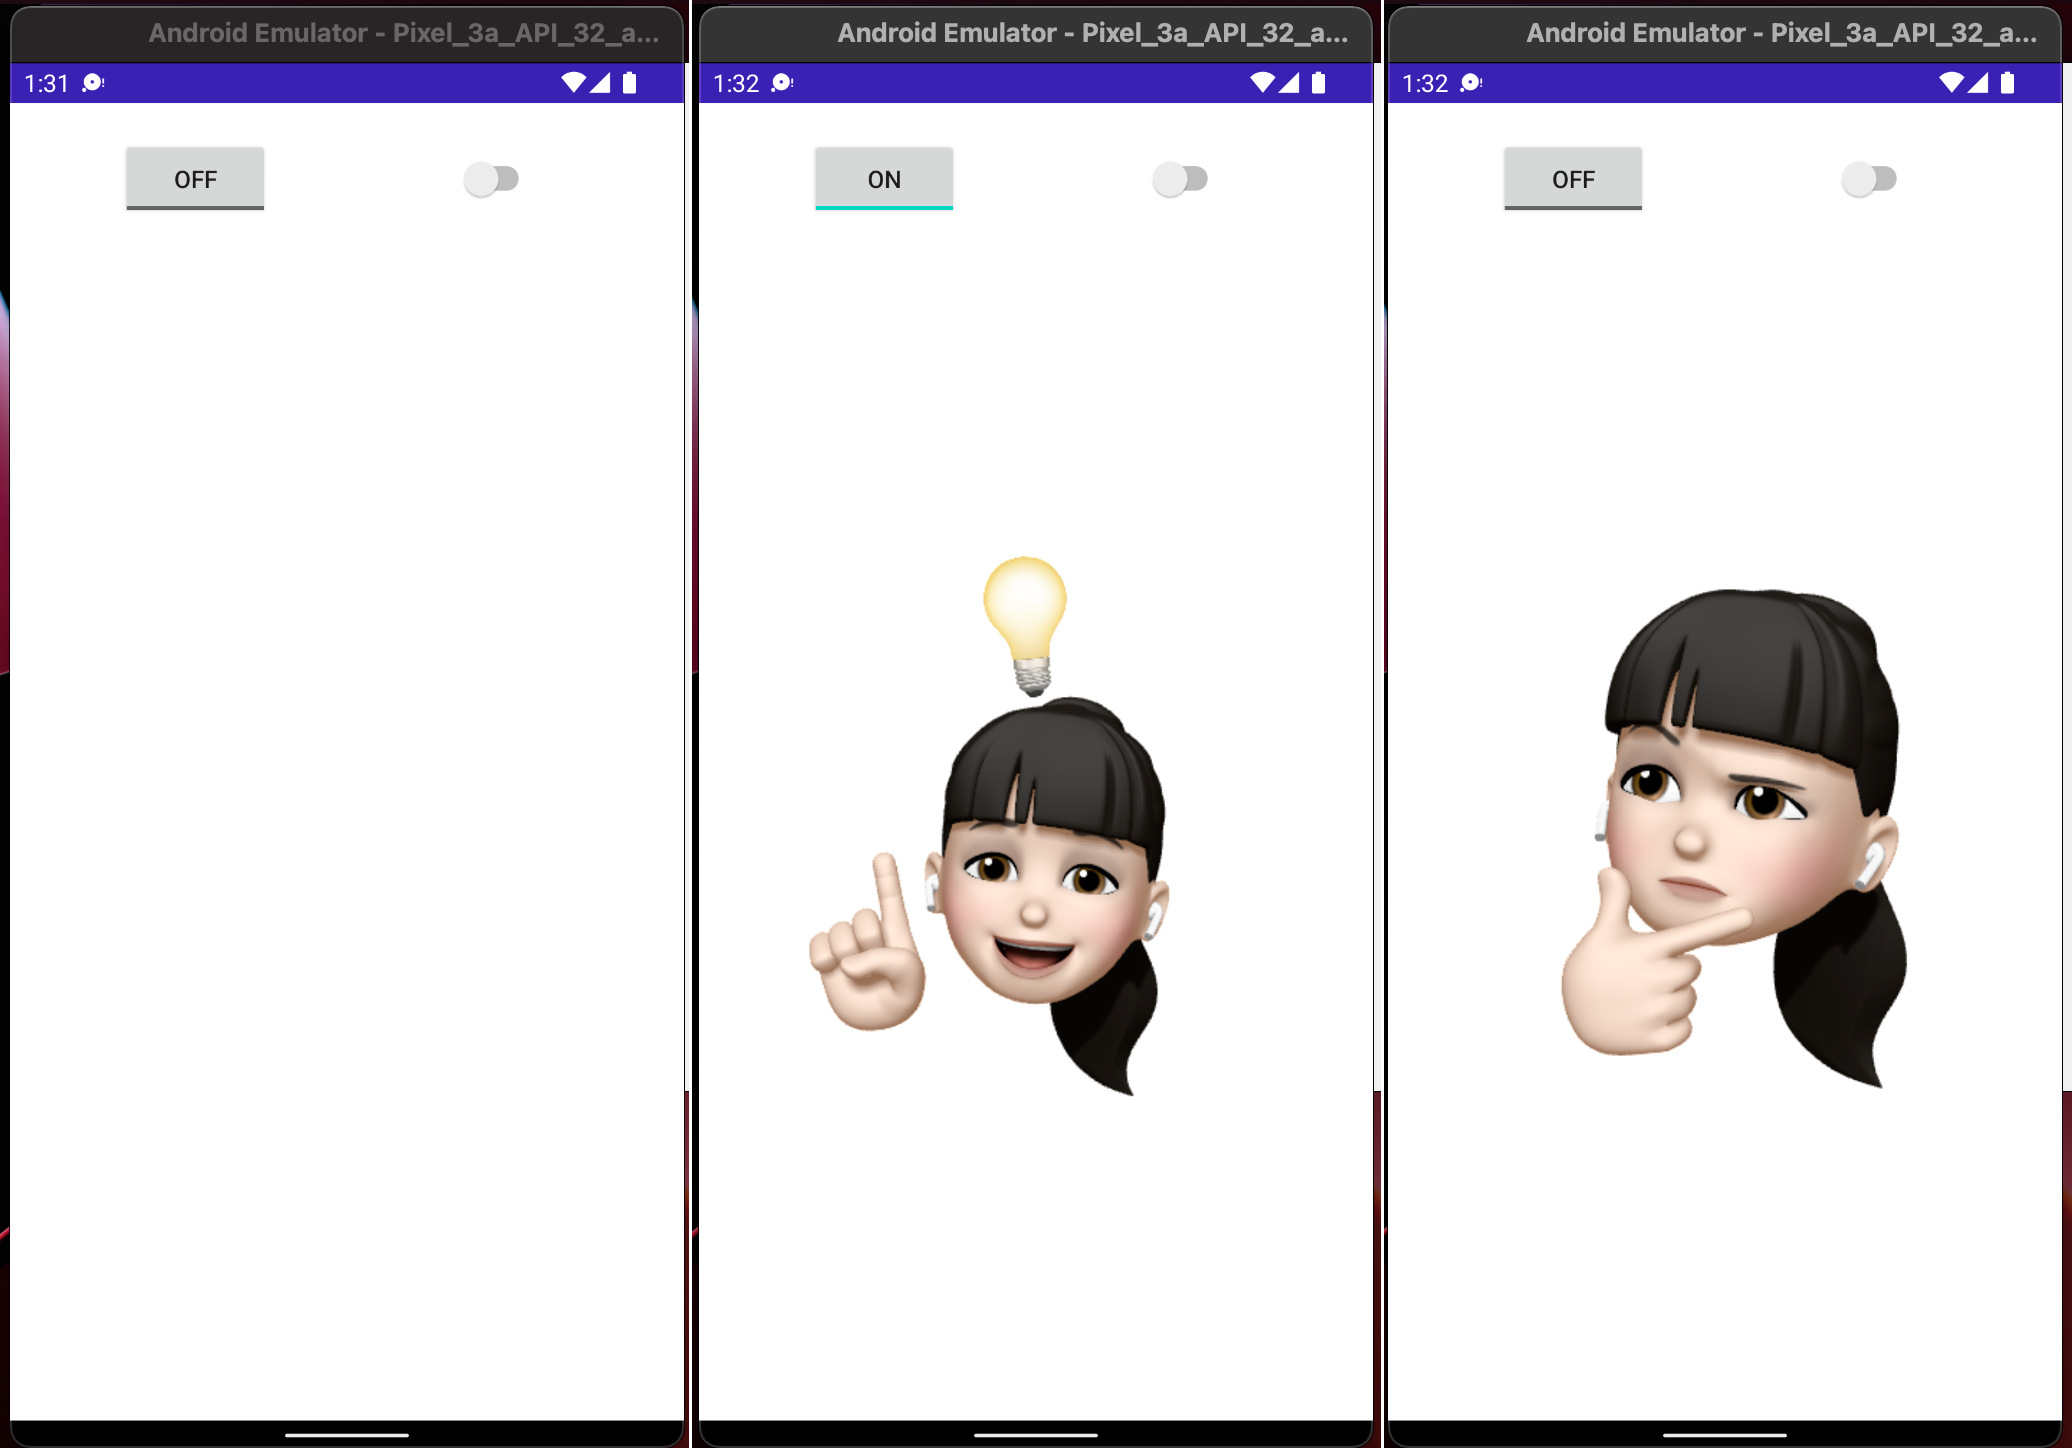
ON / OFF 기능을 사용할 수 있는
📍 ToggleButton
📍 Switch
두 가지 기능을 한번 해볼거에요 🤗
📍 ToggleButton
📍 Switch

각 위젯들의 ON / OFF 기능으로 많은걸 할 수 있어요!
요번엔 간단하게 이미지를 바꾸는걸 해볼게요!!
상단처럼 그림을 그려보러 갑니다!
activity_main.xml
<?xml version="1.0" encoding="utf-8"?>
<LinearLayout
    android:orientation="vertical"
    xmlns:android="http://schemas.android.com/apk/res/android"
    xmlns:app="http://schemas.android.com/apk/res-auto"
    xmlns:tools="http://schemas.android.com/tools"
    android:layout_width="match_parent"
    android:layout_height="match_parent"
    tools:context=".MainActivity"
    android:padding="20dp">

    <LinearLayout
        android:layout_width="match_parent"
        android:layout_height="wrap_content"
        android:orientation="horizontal"
        >
        <LinearLayout
            android:layout_width="0px"
            android:layout_height="wrap_content"
            android:layout_weight="1"
            android:gravity="center"
            >
            <ToggleButton
                android:id="@+id/btn_toggle"
                android:layout_width="wrap_content"
                android:layout_height="wrap_content"
                />
        </LinearLayout>
        <LinearLayout
            android:layout_width="0px"
            android:layout_height="wrap_content"
            android:layout_weight="1"
            android:gravity="center"
            android:layout_gravity="center"
            >
        <Switch
            android:id="@+id/btn_switch"
            android:layout_width="wrap_content"
            android:layout_height="wrap_content"
            />
        </LinearLayout>
    </LinearLayout>
    <LinearLayout
        android:layout_width="match_parent"
        android:layout_height="match_parent"
        >
        <ImageView
            android:id="@+id/image_view"
            android:layout_width="wrap_content"
            android:layout_height="wrap_content"
            android:layout_gravity="center"
            />
    </LinearLayout>

</LinearLayout>
자 그림을 다 그렸다면 이제 코드를 짜러 가봅시다 🤗
반응형
MainActivity
public class MainActivity extends AppCompatActivity {

    // 전역변수
    ToggleButton toggle;
    Switch aSwitch;
    ImageView imageView;

    @Override
    protected void onCreate(Bundle savedInstanceState) {
        super.onCreate(savedInstanceState);
        setContentView(R.layout.activity_main);

        // xml 과 연결
        toggle = findViewById(R.id.btn_toggle);
        aSwitch = findViewById(R.id.btn_switch);
        imageView = findViewById(R.id.image_view);

        // ToggleButton 의 이벤트
        toggle.setOnCheckedChangeListener(new CompoundButton.OnCheckedChangeListener() {
            @Override
            public void onCheckedChanged(CompoundButton compoundButton, boolean isCheck) {
                imageSetting(isCheck);
            }
        });

        // Switch 의 이벤트
        aSwitch.setOnCheckedChangeListener(new CompoundButton.OnCheckedChangeListener() {
            @Override
            public void onCheckedChanged(CompoundButton compoundButton, boolean isCheck) {
                imageSetting(isCheck);
            }
        });
    }

    // 각 버튼의 클릭 이벤트에 변화되는 이미지를 셋팅하는 메소드
    void imageSetting(boolean isCheck) {
        if (isCheck) {
            imageView.setImageResource(R.drawable.toggle_2);
        } else {
            imageView.setImageResource(R.drawable.toggle_1);
        }
    }
}
보시면 두 버튼은 같은 Listener 를 사용하고 있어요!!
그래서 코드 반복을 줄이기 위해 따로 메소드를 만들어서 그 메소드 안에서 이미지 바꾸는걸 해주었습니다!
아주 간단하죠?
활용 할 수 있는 방법은 무궁무진하기에 각 상황에 맞게끔 활용하면 아주 좋을것같아용🥴
틀린부분이 있거나, 궁금하신게 있거나, 그냥 아무말이나 하고싶으면 댓글 남겨주세요 🥴
봐주셔서 감사합니다 🥰
반응형
'Android ( JAVA ) > 개발' 카테고리의 다른 글
| [Android] 안드로이드 TTS(Text to Speech) 사용법 (0) | 2022.11.20 |
|---|---|
| [Android] Log 사용해보기 (0) | 2022.05.22 |
| [Android] 안드로이드 Spinner 선택 값 가져오기 (0) | 2022.02.27 |
| [Android] 안드로이드 JSON 사용하기 (feat.RecyclerView) (0) | 2022.01.17 |
| [Android] 안드로이드 WebView 사용하기 (0) | 2022.01.11 |
'Android ( JAVA )/개발' Related Articles
more


Comments